07 Jul 2015, 14:47

The Playbook

A practical guide to the growth mindset

The Playbook is a webapp I worked on for Pomegranate Lab. Its purpose is to enable teachers studying the Growth Mindset to find and shard Growth Mindset-based lesson content. The Playbook had the following set of requirements:

  • create a landing page explaining the Growth Mindset
  • allow teachers to create an account
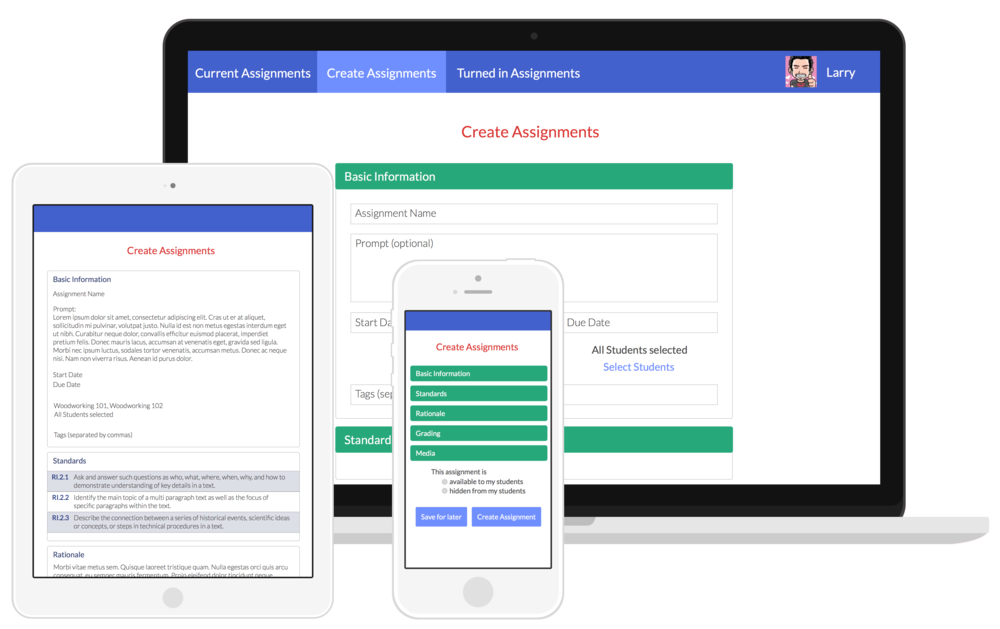
  • allow teachers to submit “Plays”, which are essentially lesson plans targeting specific Growth Mindset elements
  • plays need to be search-able by teachers, either through full-text search or a variety of categories
  • enable teachers to add Plays to their “Playbook” for quick access later
  • allow admins to curate the front-page content, approve Plays, and add new users

Back ends with Parse

Pomegranate Lab wanted to use the Playbook for its Growth Mindset coaching sessions, so development needed to begin quickly. Due to the expedited nature of the project, I decided to use Parse to cut out a majority of the work in back end development. According to Parse’s documentation: “Our goal is to totally eliminate the need for writing server code or maintaining servers”.

Database tables, user authentication/permissions, emails, and hosting are all set up using the Parse configuration console. In the rare case you do need to do something special for your back end, Parse has “Cloud Code” functions. Cloud Code is, in reality, just a node.js environment to run your code on Parse servers. Parse provides libraries for several platforms and/or languages that allow you to interact with your app’s “back end”. Parse also had support for React, which will come into play later.

Setting up all tables (or classes as Parse calls them) and their relations was a snap. Add/dropping columns only took a few clicks, which enabled me to quickly build and iterate on The Playbook’s various features. Data permissions are set by assigning user roles and then giving those roles CRUD permissions for different data classes.

Using React for an easy to understand UI

To build the front end, I decided to use a library I had been hearing a lot about called React. React is “A JavaScript library for building user interfaces” created by Facebook. It encourages you to separate UI functionality into small pieces called ‘components’. Components take application state as parameters and returns what should be displayed. Since code is separated into units usually focused around a single functionality, components are very easy to test and human readable. For example the code to display The Playbook’s collapsible menu is:

<SlideMenu>
  <MenuItems></MenuItems>
  <MenuPanel>{this.props.children}</MenuPanel>
</SlideMenu>

Which renders as the following:

Menu Image

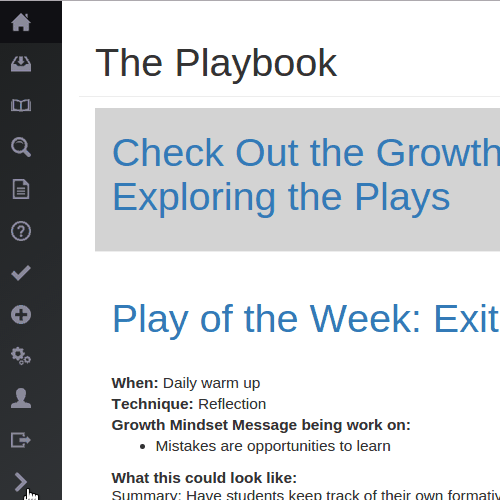
This kind of logical project structure and readability was something I dreamed about when working on other projects.

ES6 bringing JavaScript development to the 21st century

Unfortunately most browsers do not support the newest JavaScript functionality out of the box, and there are same great improvements coming in future versions of JavaScript. For example a simple function to add 5 to a number might look like this in the current version of JavaScript:

function addFive(num) {
  return num + 5;
}

But with the newer versions of JavaScript, the code could be condensed down into something more readable like:

let addFive = (num) => num + 5;

With this in mind, I decided to use the Babel transpiler to write the front end code in ES6 JavaScript. Babel takes your ES6 JavaScript code and converts it into ES5 (the current standard) JavaScript that browsers today expect. This let me use modern JavaScript features such as promises, lambdas, and classes in the development of The Playbook.

Putting it all together with webpack

Building a single page webapp with JavaScript is a bit different that building a traditional webapp. You have lots of small (mostly js) files that cause pages to load slowly, since it starts a new request for each file. Ideally you could combine files of similar types during your build process and make your webapp load much faster. This is where webpack comes in.

webpack is a module bundler that bundles all your webapp’s files and condenses them into static files for easy hosting. JavaScript is concatenated and minified (most whitespace and newlines are removed) into a single js file that is loaded by a main.html file. webpack also gives you the ability to install npm libraries as project dependencies and use them in your front end. It also plays well with font end only libraries, React and Parse in our case, trimming unused code and shrinking your overall project size.

Configuring webpack can be a bit of a challenge the first time, but once set up the build process for The Playbook was very simple:

  • Run webpack
  • Upload output files to Parse
  • You’re done!

The Playbook is still in use, however, it is in closed beta for teachers.

01 Jan 2015, 14:47

Austin Google Fiber

The Fiber dream

When my wife, Jesyka, told me she got a job at IBM in Austin, TX my first thought was: CONGRATUALTIONS! My second thought was: My friends are going to be super jealous when I tell them I’m getting Google Fiber.

The Fiber reality

After scouring apartment listings in Austin, and doing a bit of research, it became clear that there were a few problems with my Google Fiber dream:

  • Roll-out was only scheduled for specific areas of Austin
  • None of the areas were a reasonable commute distance from Jesyka’s work
  • New areas were being added slowly

Google provides an excellent map of Fiber listings in Austin but there was no way to actually tell how often the listings were updated, if at all. Not to be deterred, I decided to write a webapp to track new Fiber listings, as they were added.

Reverse engineering Google Fiber listings

Using Chrome Developer Tools, I was able to check network traffic on the Google Fiber map and discovered that the data for all Fiber enabled apartments was being stored in a JSON file. This JSON file was used by Google to build the apartment map on page load.

Rather than use inline linking for my webapp, I wrote a Go tool to fetch, parse, and store apartment data in a separate database on Heroku. This prevents page loads from my app causing additional traffic on Google servers. Heroku’s background job scheduler runs the tool a few times a day, to avoid the server stress mentioned earlier.

For the front end of the webapp, I used AngularJS. The front end uses an AJAX request to query the Heroku back end for JSON apartment data. The apartment data is then loaded into a table, which lists important information such as the name of the apartment complex, address of the apartment, and time the listing was added. Using AngularJS’ built-in data filtering, users can search for listings by apartment name or address.

Check it out

The Austin Fiber site is still up here. The code is also available on Github.

18 Dec 2014, 00:00

Marie Antoinette's Gluten-Free Bake Shoppe

From restaurant to manufacturer

I’ve worked with Marie Antoinette’s Gluten-Free Bake Shoppe, as their Lead Developer, since the company was founded. In late 2014, the company decided to shift their business strategy. The owners closed their restaurant and chose to focus and grow their manufacturing and distribution business by selling directly to vendors instead.

Requirements

After working with the business owners, a designer, and speaking to product vendors, the following list of requirements for the new website was created:

  • display information about the bakery (contact, hours, etc)
  • allow customers to browse and search the bakery menu
  • allow customers to place online orders, which could be shipped or picked up
  • create a separate menu and order placement system for vendors
  • admin ability to edit menu items, create vendor invoices, and approve new vendor accounts
  • quick development is preferable as the current site lacks functionality

Roll your own or use a prebuilt solution?

First I considered using an off the shelf solution. Creating a content management system and ordering system from the ground up is quite a bit of work. I did research into existing “shopping cart solutions” such as Shopify or Magneto. Unfortunately, none of the existing systems I could find were able to satisfy all of the requirements. To use an off the shelf solution, I would need to extend the code base with a plugin in the language “chosen solution” was written in. Rather than go down a rabbit hole of foreign application architecture, undocumented features, and learning a new language, I decided to rebuild the Marie’s site from scratch.

Front end structure

The front end was built using AngularJS and Bootstrap 3. AngularJS’s strength lies in its two-way data binding as well as its large selection of third party libraries. Functionality, such as filtering a list of menu items based on a search, is fairly trivial to do in AngularJS. Coupling AngularJS with Bootstrap allowed me to rapidly set up, try out, and iterate different layouts with the designer. Bootstrap is designed to be customizable out of the box, so changing how everything looked was no problem.

Why Go?

For the back end I chose to use the Go programming language. I had been using Go in my side projects for a while and I wanted to leverage Go’s strengths of:

  • a robust standard library
  • easy to deploy to a variety of platforms (I chose Heroku)
  • excellent performance
  • built in concurrency
  • official library support for Stripe (our payment processor)

I chose to use the Martini web framework after hearing about in on the Changelog Podcast. Martini has several upgrades the from the built-in Go web framework that the Marie’s site would rely on. These include:

  • middleware support for simple HTTP request/response modifications
  • improved routing controls, making REST API endpoints easy to write
  • dependency injection make sure that you always have access to the correct objects

I also chose to use GORM to connect to the database. GORM allows you to declare normal Go structs that map directly to database tables. When you make a database query with GORM, it’s a series of methods that return an easy to use Go struct. Using an ORM library, over manual SQL queries, made sense for the Maries site as development speed was more important than raw performance.

Still going strong

The Marie’s website is still up and running today with both vendors and regular customers making online orders! You can check it out here.

25 Jul 2014, 14:47

Common Ground

Teacher-centric lesson planning

Common Ground, a companion webapp to Inscribe, enabled teachers with Inscribe accounts to create lesson plans for their current courses. Teachers could also export lesson plans and collaborate with other teachers on shared lesson plans. Common Ground had the following requirements:

  • share login and user data with Inscribe
  • allow teachers to create lesson plans for Inscribe courses
  • populate lesson plans on a calendar
  • ability to easily export lesson plans to a variety of formats
  • enable sharing of lesson plans and editing by multiple teachers

Talking to Inscribe

Although the back end for Common Ground was written in a different language than Inscribe (Go and Python, respectively) it was pretty easy to communicate over HTTPS between the two. When a user would login to Common Ground, the following process took place:

  • login request sent to Common Ground
  • Common Ground forwarded the login request to Inscribe over HTTPS
  • Inscribe checked the user’s credentials and returned a JSON Web Token(JWT)
  • Common Ground sent the JWT back to the user to be stored client side

Common Ground and Inscribe shared the same JWT secret key, which is used to determine the validity of JWT claims. Sharing the JWT secret key between the two back ends made it so Common Ground could validate claims for Inscribe JWTs, instead of checking with the Inscribe back end every time the user tried to do something.

Front end lessons from Inscribe

After the lessons I learned from Inscribe, I immediately chose to use AngularJS for Common Ground’s front end. Using the same front end framework across both Inscribe and Common Ground had the added benefit of allowing me to reuse code across the two projects. This enabled the team to quickly get Common Ground up and running.

Iterate early, iterate often

Today Common Ground is no longer in use. After extensive user testing, Pomegranate Lab determined that a different approach was needed to help teachers better connect with their students. This project later iterated into The Playbook.

When it was around, Common Ground looked like this:

Inscribe Img

10 Oct 2013, 14:47

Inscribe

Assignments with a Growth Mindset

Inscribe is the first webapp I worked on for Pomegranate Lab. It’s purpose was to help teachers connect with their students by providing in-depth feedback about the student’s assignments, and additionally provide context around what the student could do to improve their grades. Inscribe had the following requirements:

  • teachers can create courses and manage which students are enrolled in their courses
  • teachers can create assignments from scratch or based on an existing rubric
  • students can complete assignments online
  • teachers can grade submitted student assignments and provide detailed feedback on how they can improve

Python to the rescue

Because Inscribe was one of the first webapps I had ever worked on, I wanted to make sure I chose a language I was familiar with, in order to not slow down development. Python is one of my favorite programming languages and is well equipped for web development, so it was a perfect fit.

Being new to web development, I researched several different Python web frameworks before settling on Flask. Flask is designed to be as unobtrusive to your development process as possible. The Flask core library gives basic functionality for a webapp, and extra functionality like user authentication or database connections can easily be implemented with plugins.

Hosting with Heroku

I looked at several different possible hosting solutions for Inscribe and wound up settling on Heroku for the following reasons:

  • Set up was much easier than something like a VPS.
  • Deployment was git based and I was already using git for version control.
  • The development tier was free and would cover our initial business needs. The ability to automatically scale was there if we needed more resources.
  • Heroku offered easy to use add-ons like databases, email services, logging, and more.

In terms of a database I used PostgreSQL, for which Heroku provided an excellent free tier. Since development speed was more of a concern than raw database performance, I chose to use the SQLAlchemy ORM. SQLAlchemy lets you treat database entries as python objects. This allows you to keep your mental focus on Python code, rather than bouncing back and forth between SQL queries and Python.

Handling data on the back end

Inscribe’s back end handled a variety of data operations including user login sessions, assignment data, grades, and rubrics. User authentication was handled through JSON Web Tokens (JWT) sent over a HTTP header and saved client side into a cookie. I chose to use JWT over other authentication methods, since it’s a language agnostic specification that is robust and secure. When a user tried to update or create data the back end could check their JWT and make sure that:

  • they are a valid user
  • they have permission to create or edit the data

Student accounts for Inscribe were free, but teachers were required to pay a monthly fee. Rather than charge teacher credit cards directly, I chose to use Stripe to handle all payment processing. Credit card numbers we sent directly to Stripe servers from the browser. Stripe then returned a token that could be used to make a charge to the teacher’s card from the Inscribe back end. While this is a bit of extra coding up front, it removed all the extra security hassle that comes with handling credit card numbers directly.

Figuring out the front end

The front end of Inscribe went through several architecture iterations. Initially I built the front end for Inscribe using Jinja2 templates and JQuery. When a browser requested a page, the back end would load the proper data for a page from the database and generate the HTML based on that page’s template file. This method worked quite well initially. However, as the site grew and the features became more complex, organizing both the code and the pages became complicated. After researching different solutions and consulting with the rest of Pomegranate Lab, I chose AngularJS for the next iteration of Inscribe’s front end.

The main feature that drew me to AngularJS’s is its two-way data binding. Two-way data binding makes it very easy to implement features in AngularJS that would have been fairly complicated to do with just JQuery. After only a couple of weeks rewriting Inscribe, the new AngularJS version was at feature parity with the old JQuery version. Additionally, rewriting the front end allowed me to simplify the back end. No longer would the back end have to fetch data and render each page. Now the back end was, for the most part, a collection of REST API endpoints.

Iterate early, iterate often

Today Inscribe is no longer in use. After extensive user testing, Pomegranate Lab determined that a different approach was needed to help teachers better connect with their students. This project later iterated into The Playbook.

When it was around, Inscribe looked like this:

Inscribe Img